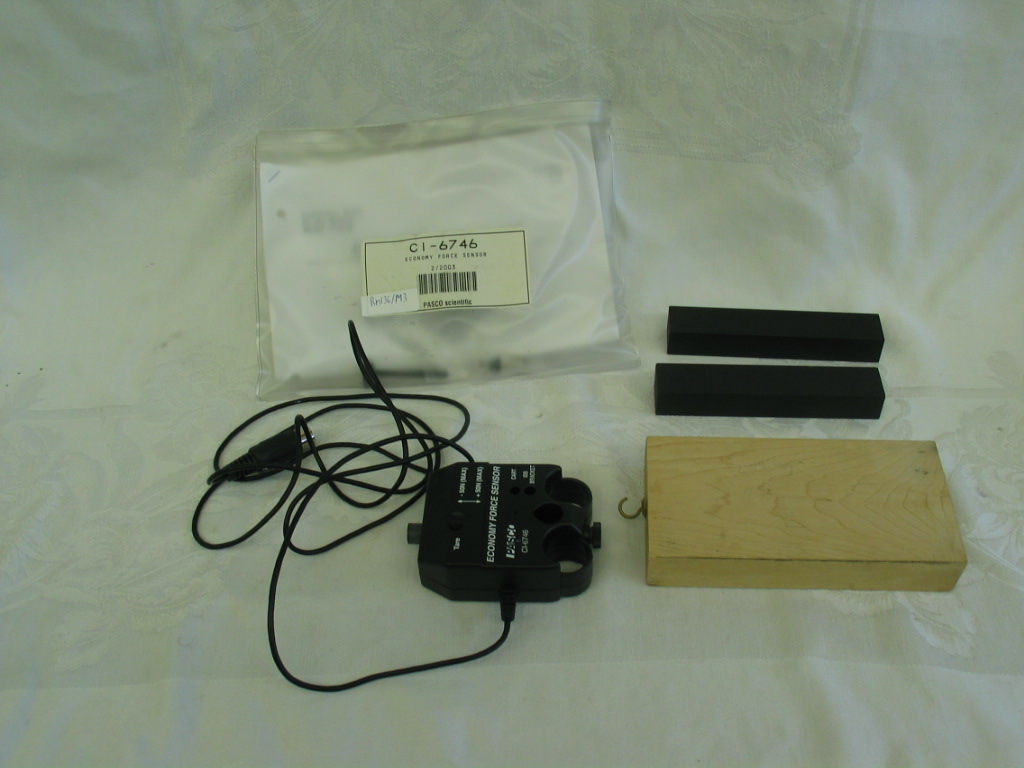
Room 136; economy force sensor and wooden block, shelf M6; two black 500g masses, shelf B3 (top left)
Description
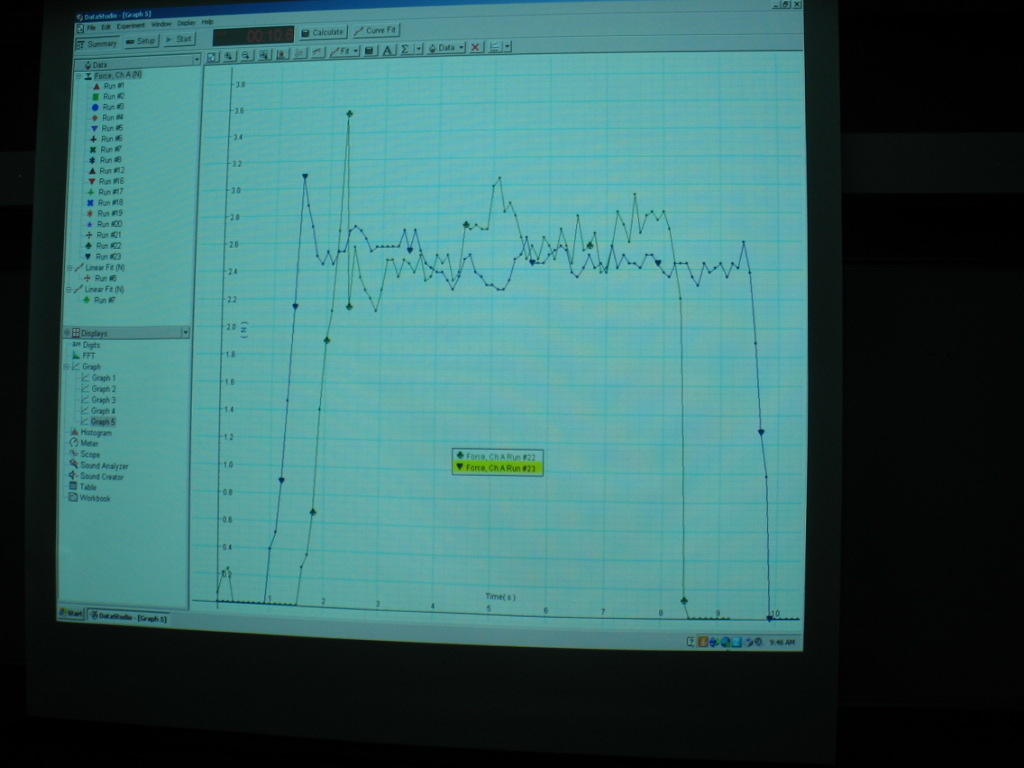
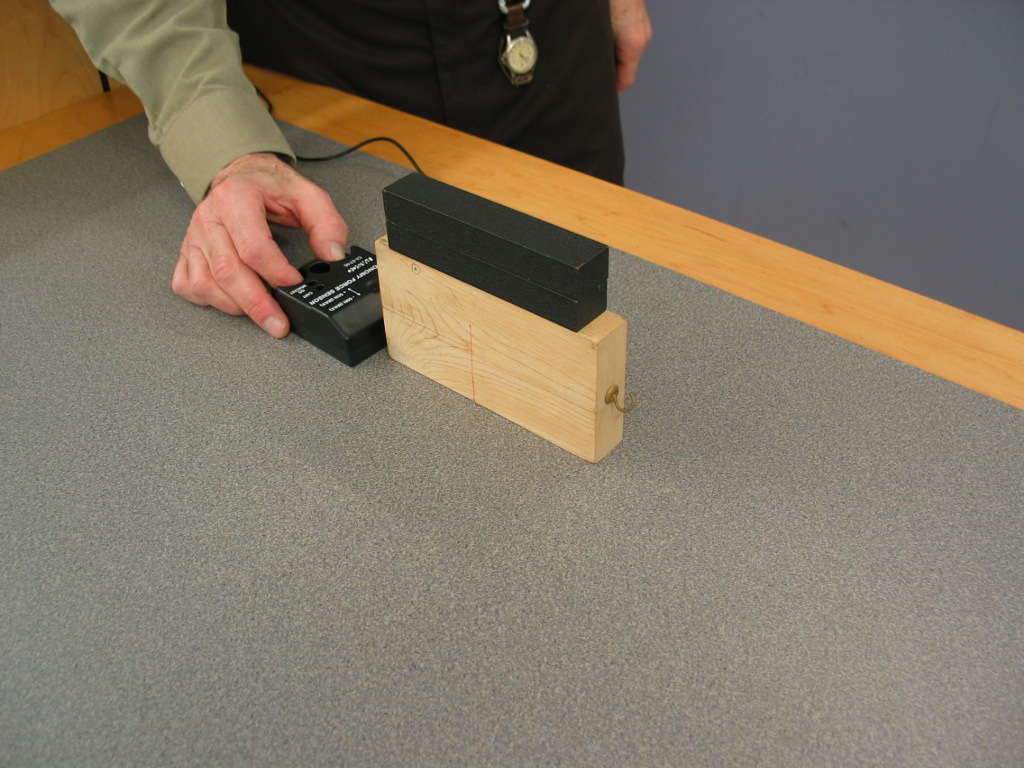
Make sure the rubber "bumper" is in the force sensor so you can push with it and get a positive force. Move the front desk next to the podium so you can display the force graphically on the front screen using Data Studio. Put the masses on top of the flat face of the block. START graphing the force then slowly bring the force sensor in contact with the center of the block and start it sliding across the desktop at constant velocity (top right), then remove the force sensor from contact and click STOP. Your graph should make it clear that the force needed to maintain constant velocity is less than the force needed to overcome static friction. Finally, put the block on its edge and stack the masses on top. START graphing and bring the sensor in contact with the block (with the force sensor on the desktop and the bumper aligned with the block) and start it sliding at constant velocity (bottom left), then remove the sensor and click STOP as before. Compare graphs. It should be apparent that, even though one has a different, much smaller surface in contact with the desktop, the friction force graph is nearly the same. You can go one step further and add or subtract masses to show that the friction forces are approximately linearly proportional to the normal force (i.e. weight) pushing the surfaces together.